Explaining emergency eventsTe whakamārama ohotata
To examine the effects of natural emergency events, students need to have some understanding of how those events occur. The following scientific investigations will help build these understandings.
On this page
Explaining earthquakes
The Science of Earthquakes
Our Earth is not a solid rock but is made up of a series of different layers. These are the crust, the mantle, the inner core and the outer core. The crust is the outside layer that we live on and is a series of solid plates that float on the liquid mantle below.
The plates are constantly moving due to convection currents occurring in the mantle layer. This layer is liquid magma and heats up and cools down resulting in convection currents.
Some of these plates move apart. Such as the plates running down the middle of the Atlantic Ocean.
Some plates move directly into each other. Such as the collision of the Australian Plate with the Pacific Plate forming the Southern Alps in the South Island.
Others form subduction zones, where one plate moves under the other. This occurs in New Zealand in the North Island, causing a line of volcanoes and geothermal areas.
When plates move we get small cracks called fault lines. As fault lines move there can be either a gradual release of energy or a sudden release of energy resulting in earthquakes.
The Richter Scale measures the size of an earthquake. It is a measure of the energy released. When earthquakes are deep in the Earth their energy is the same. But the shaking does not feel as strong as shallow earthquakes.
The amount of shaking you feel is another way to describe earthquakes. We call this the intensity. The intensity is stronger when you are close to the earthquake source and when the earthquake is shallow. It decreases the further away you are. We describe earthquakes by the energy released, which is their magnitude. We also describe them by how strong the shaking feels, which is their intensity.
Find more resources for teaching students about earthquakes.
-
Build a quake-safe structure or design a building that could withstand an earthquake. Use materials like playing cards, Lego, wooden blocks and collected items from the school garden.
Investigate to find the answers to these questions.
- What is the best material for it to build with? Why?
- What variables make a difference? Height? Weight? Stability?
Explaining floods
There are many parts of Aotearoa that a flood could affect. In fact, floods are the most common emergency event around the country.
The science of floods
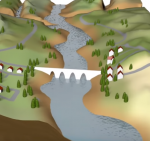
The water cycle is when water circulates from clouds to the soil to streams to rivers to the oceans and then returns to the clouds.
When a lot of rain falls, it can be too much for the soil to soak up and streams can fill up. When streams and rivers fill up faster than they can flow out to sea, the water runs onto land and causes a flood. Urban flooding can also happen when there is too much water for the storm water drains to clear.
-
Use a flood map to adjust imaginary floodwaters to show how much of the land could end up under sea level.
- Use a flood map and topographical maps or satellite images of your local area. Create a clay model of your local waterways and add local landmarks.
- Add water to this model (“rain”) to show what we could lose in a flood.
- Ask students to be creative in designing responses to the threat of flooding in your community.
Explaining landslides
The Science of Landslides
The crust of the Earth may be solid rock but it has also changed over millions of years to form soil. This process is always happening. Soils come in different varieties. Soils wear down or wear away because of water, wind and human activities. We call this erosion.
Where soils have built up over time, a sudden event such as a heavy rain, flooding or an earthquake can quickly move a large amount of soil. This is a landslide. But, this also depends on the type of soil and how ’sticky’ the soil particles are. ‘Sticky’ soil particles have lots of friction. They hold together better than ‘smooth’ soil particles, which slide easier. It also depends on factors such as tree roots, which help hold soil together. Gravity can also play an important part, as the steeper the slope of the land the greater the effect of gravity.
Explaining storms
The Science of Thunderstorms
Above the crust is a layer of air that is essential to all living things, called the atmosphere. Our atmosphere divides into different layers. Closest to the ground is the troposphere, which is about 8–15 kilometres thick. This is the layer where most of our weather occurs as it is the most dense.
The air in the atmosphere is always moving as it heats up and cools down. This causes convection currents that we experience as wind. Clouds are also a visible sign of these convection currents. This means that the air becomes unstable. When unstable air meets lots of moisture, there is the potential for thunderstorms.
-
Use to represent hot and cold air. Blue water represents the cold air mass and red water represents the warm and unstable air mass. The warm water (air) rises by approaching cold water (a front). This is where thunderstorms would form.
Have the students take photos of the experiment and annotate the photographs afterwards.
Materials
- Large rectangular plastic or glass container
- Ice-cube moulds
- Warm water
- Red and blue food colouring
Method
- Pour some water in the ice cube moulds, add a few drops of blue food colouring and freeze it. Once frozen, add 2 or 3 cubes to one end of the rectangular container.
- Then pour some warm water into the plastic container, filling it almost to the top. Add a few drops of red food colouring at the opposite end of the container to the ice cubes.
- Both dyes should immediately start to disperse and move together.
Explaining tsunami
The Science of Tsunami
Tsunami form when there is an earthquake that causes a vertical shift in the bottom of the ocean. This displaces the water, which causes a series of waves to form. The waves travel out from the source like ripples travelling across a pond after you drop a pebble in it. Tsunami waves can travel across entire oceans. Landslides can also cause tsunami.
Helping students to understand Tsunami
To help students understand how damaging a tsunami can be, introduce the concept of shoaling. Shoaling helps explain why tsunami waves get taller as they approach the shore. The taller they are, the more damage they can cause.
Explaining volcanoes
The Science of Volcanoes
Volcanoes are mostly found along the borders between plates in the Earth’s crust. The Earth’s plates move around because they are floating on top of a layer of liquid rock called magma. Magma forms the layer we call the mantle.
This layer is under a lot of pressure. If there is a gap in the plates, the liquid rock can be forced out. Just like when you shake a bottle of fizzy drink and then open it.
When the magma is forced out above ground, it cools to form solid rock. This is lava. Lava can flow in sheets to form layers of new rock, but it can also build up hills and mountains, which we call volcanoes.
New Zealand’s active volcanoes are on the North Island or in the sea near the North Island. Volcanoes can produce lava as well as ash, lahar and a range of different gases. Some of these extremely poisonous.
The shape and size of a volcano depends on the materials in the magma, the force of the explosions and its age. Volcanoes can be extinct, dormant or active.
The most common volcanic hazard is ash. It is very scratchy because volcanic ash is tiny pieces of sharp rock. When an eruption happens, the wind can carry ash hundreds of kilometres. During the volcanic eruption of Mt Ruapehu in 1996, a thin layer of ash covered farms, cars and buildings.
-
Make small volcanoes out of gelatine and show how pressure in a volcano causes the eruption of magma.
Materials:
- 1 pack of Gelatine
- 1 cup boiling water
- 1 paper plate
- A plastic syringe
- Cold water
- Red food colouring
- Needle
Method
- Add gelatine into the boiling water. Stir until dissolved, pour into small cups or bowls and chill in the fridge for a few hours. The gelatine in the moulds are the mini volcanoes.
- Cut a circle, bigger than the base of the volcano, from a paper plate. Poke a hole in the middle of the circle and put the gelatine volcano on top. Make a small “crack” in the surface of the volcano with a needle.
- Fill the syringe with water (dyed red). Push the syringe through the hole in the paper plate and empty the dyed water into the gelatine mould.
- This will form a magma chamber and small vents inside the volcano. As magma is forced into the volcano, it should erupt through the crack in the top.
Earthquake resources
These resources help to teach students about the science of earthquakes.

Find resources from the Science Learning Hub to help students learn more about the science of earthquakes.

Watch this video from GNS Science explaining basic tectonic plate movement.

Learn more about earthquakes on Get Ready.

Learn how to build an earthquake-proof structure.

Use this resource from Te Papa to teach students to create resilient communities.
Flood resources
These resources help to teach students about the science of floods.

Use this map to adjust floodwaters to show how much of the land could end up under sea level.

Read a New Zealand perspective on floods on Te Ara, The Encyclopedia of New Zealand.
Watch this video explaining floods and the damage they can cause.
Learn more about floods on Get Ready.
Landslide resources
These resources help to teach students about the science of landslides.

Use one of the experiments shown in this video to look at different kinds of erosion and landslides.

Do this experiment from Scientific American that uses physics to explain land movement.
Learn more about landslides on Get Ready.
Visit the Toka Tū Ake Earthquake Commission website for more information on making your home safer.
Watch this GNS Science video explaining some of the processes and features of the Dart landslide.
Read a New Zealand perspective on landslides on Te Ara, the Encyclopedia of New Zealand.
Storm resources
These resources help to teach students about the science of storms.

Use these factsheets from Science Kids about different aspects of storms.

See real time satellite imagery and thunderstorm warnings from MetService to track the storm activity in your local area.

Play this interactive game to build your own hurricane. Learn what kinds of wind conditions, latitude and sea temperature are good for a hurricane to form.

Learn more about storms on Get Ready.
Tsunami resources
These resources help to teach students about the science of tsunami.

Learn about shoaling and how it works.
Learn more about tsunami on Get Ready.
Watch this video from GNS Science explaining how tsunami are formed and the damage they can cause.
Read a New Zealand perspective on tsunami on Te Ara, the Encyclopedia of New Zealand.
Volcano resources
These resources help to teach students about the science of volcanoes.

Find information about Auckland's volcanoes from Auckland Museum.

Learn about volcanoes on Get Ready.
See New Zealand's volcano cameras and the current volcanic unrest in New Zealand.
Read a New Zealand perspective on volcanoes on Te Ara, the Encyclopedia of New Zealand.
Watch this video from the Science Learning Hub explaining rock cores.