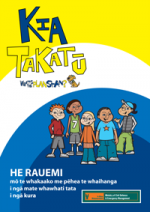
Lesson ideas for years 1–3He ariā akoranga mō ngā tamariki tau 1-3
What's the Plan, Stan? has suggestions for teaching and learning programmes for students in years 1–3. It focuses on emergency events and the impacts they could have on your community.
On this page
Before you begin
-
Before starting with these learning experiences, assess prior knowledge. Introduce new vocabulary and concepts.
You can use your literacy programme to see where your students’ needs are. Search Instructional Series or PM readers for books that you will already have in your school.
-
Students should learn the difference between hazards and emergencies. It helps them understand the gravity of a situation and how they should react. Keep the examples and scenarios familiar and simple.
Hazards
A hazard is a danger or risk. Often we can recognise and remove hazards before anyone is in danger. Familiar examples of hazards include:
- a floor that is wet from cleaning
- toys strewn across the floor
- a table with a wobbly leg.
Discuss hazards at different locations such as at the beach, the park, at home or at school. Draw a classroom map and ask students to do the following.
- Draw pictures of potential hazards
- Glue their pictures to the map
- Write sentences describing the hazards and how to deal with them.
Students could complete a map to show hazards on their way to school. What is the difference between your maps? Hang the maps side by side to look at frequency of hazards and who can help you deal with them.
Emergencies
An emergency is a serious, unexpected and often dangerous situation requiring immediate action. Preferably with the help of an adult.
Talk with students about who responds to emergencies and the roles they play. Pay a visit to an emergency responder or ask them to come to you.
-
An emergency event that happens to a lot of people at the same time is sometimes called a disaster. This is a sudden accident or a natural catastrophe that causes great damage or loss of life.
Ask students to name emergency events and then focus on those that are common in New Zealand.
- Earthquakes
- Floods
- Landslides
- Storms
- Tsunami
- Volcanic eruptions
These following activities help students to explore what an emergency event is.
Visual brainstorm
Write the six common New Zealand emergency events on a strip of coloured paper.
Hang a piece of paper from the strip and collect student ideas in words or pictures. This could be anything at all that they would know, feel, see, smell or hear if one of these things happened. You could write or print out their ideas, in text or pictures.
Each of these strips of ideas are great oral language or writing prompts to use throughout the learning.
Photo disclosure
Photo disclosure is an effective strategy for:
- assessing prior knowledge
- addressing misconceptions, and
- stimulating discussion and critical thinking.
Select photographs of emergency events to use in this activity. The National Emergency Management Agency has a photo library of New Zealand emergency events.
Use blank paper to cover part of each photo. The part of the photograph students can see will give clues, but not the whole story. Ask students to describe what they think the whole photo shows. As they talk, expose more of the photo. Throughout this process, ask guiding questions.
- What do you think the people in this photo are doing?
- Where do you think this is?
- What do you think is happening?
- What gives you clues about what the whole picture may show?
Look at the uncovered photographs. Discuss the students’ ideas and ask the following questions.
- What things are the same or nearly the same in all the photos?
- Are any of the things you see happening familiar?
- Do you think this could happen here?
- What do you think might happen next?
Students could do the following.
- Group the photos according to their own criteria, and display them for future reference.
- Make digital stories to share with the community before and after school or on a blog. Programmes such as Voicethread can combine visuals with student voice recordings.

Search Instructional Series or PM readers for books that you will already have in your school.
Emergency events — What's the science?
-
Tectonic plates
Tectonic plates cover the earth like a jigsaw puzzle. The movement of tectonic plates can create mountains, earthquakes and volcanoes. What they create depends on the way the plates are moving.
- When plates push together, they create mountains and volcanoes.
- When plates pull apart or move side to side, they create an earthquake.
Pushing together
- Listen to the sounds of an earthquake in a video by Georgia Tech. Scientists have turned their measurements from seismometers into sounds that we can hear.
Ask — What is making all that noise? Encourage the students to talk about the plates of the earth slowly pushing together. - Get two flat mats or large pieces of cardboard. Place them on the floor and ask the students to draw the town or city they live in. This can be as simple or elaborate as you like — a flat drawing or 3D model buildings.
- When the design is complete, slowly push one of the plates towards the other and see what happens. Does it buckle? Does one go over the other? Encourage the students to record their observations, in writing or digitally.
Pulling apart
- Photocopy a map of your local area and cut it into two or three pieces. Fold a long rectangle of paper like a fan or concertina and then place it on the ground or a table.
- Put the pieces of your map so that they fit together again, but are not overlapping.
- Ask two students to pull the paper very slowly and let the class see how the pieces of the map pull apart.
The moving earth
Use a slinky toy to show how the Earth’s movement during an earthquake creates “waves”.
With one person holding each end of the slinky, stretch it out so that it is lying flat on the floor or on a table. To make a wave, one person quickly pushes and then pulls the slinky toward and then away from the other person. The other students can observe the wave as it travels along the slinky to the other end. You can also quickly move the slinky from side to side. The wave will travel along the slinky once again to the other person and may turn around and travel back.Find more resources for teaching students about earthquakes.
Find out about past earthquakes that have happened in New Zealand.
-
Small raindrop, big effect
The most common cause of flooding in New Zealand is heavy rain. To show how vulnerable houses are in a flood, try this demonstration with your students.
Materials:
- A flat container
- Mud
- Small cardboard houses and other buildings representing your local area
- A water bottle
- A paper cup with holes pierced in the bottom or a sieve.
- Build the mud into a hill with a space at the edge for a river (about 5 cm wide).
- Tip water into the river so that it touches the edge of the lowest side of the mud.
- Ask students to make small cardboard buildings that represent where they live and place them in different areas on the mud.
- Students take turns making rain by pouring weather through the cup or sieve, and watch what happens to the town and the houses as the river level rises.
- Record predictions and observations in words or drawings.
Find more resources for teaching students about floods.
Find out about past floods that have happened in New Zealand.
-
Land erosion
Use this erosion experiment to investigate how weathering and erosion can cause landslides.
- Make a mountain out of sand and fine soil in a container.
- Show wind erosion by blowing onto the mountain through a straw. To show how this process does not happen quickly, ask students to walk in a circle and have multiple turns. Count how many turns each child had before the “wind” made a difference.
- Once a small amount of wind erosion has occurred, punch small holes in a paper cup to make rain, or use a very fine sieve.
- Have students move around the mountain in a circle again, taking turns to be rain clouds. Help the students to notice that the amount of time it takes for the mountain to collapse is hard to predict. It is dependent on the cumulative amount of rain or wind — and so landslides can be surprise events.
- Record predictions and observations in words and pictures.
Is there erosion here?
Go for a weathering and erosion walk around your school or community to see what you find. Create a scavenger hunt for the students. Ask the students to predict what they think could have created each effect on the landscape.
Find more resources for teaching students about landslides.
Find out about past landslides that have happened in New Zealand.
-
Gale force
There are many parts to a storm and the way it can damage property and injure people.
To experiment with wind, set up a learning table. Ask the students to bring in small objects, and supplement them with some of your own. Have a variety of light and heavy objects, ones that will roll and some that won’t, and so on. For example:
- cotton balls
- feathers
- pom-poms
- marbles
- blocks
- small plastic/wooden toys
- small houses and cars.
To create wind, help the students fold some paper fans and provide large straws, bubble guns without bubble mixture or an electric fan. Experiment to see how lighter and stronger winds affect the objects. What happens to objects that are different weights or shapes? Make predictions and observations and record in writing or diagrams.
Find more resources for teaching students about storms.
Find out about past storms that have happened in New Zealand.
-
Big waves, big effect
Start this experiment on a table that you can easily shake.
- Ask students to create a "beach" using a mixture of sand and corn flour in one end of a rectangular container
- Build little paper houses to add to the beach.
- Add water to the empty end of the container, making sure not to wash all the beach away.
A good shake of the table will create an "earthquake" that results in a tsunami. This will give students an idea of how destructive tsunami can be.
Find more resources for teaching students about tsunami.
Find out about past tsunami that have happened in New Zealand.
-
Volcanoes and the earth's crust
To understand volcanoes you need to understand a little about the structure of the Earth.
- Take a hard-boiled egg and crack its shell. Does the egg remind you of anything? The egg is a tiny model of the Earth. The thin shell represents the Earth's crust, divided into plates. Within the shell is the firm but slippery mantle.
- Move the pieces of shell around. Notice how the shell buckles in some places and exposes 'mantle' in other places. The same thing happens on Earth. On Earth, this activity causes mountains, earthquakes and new ocean floor.
Make a volcano
Turn the classic baking soda and vinegar volcano into something more realistic by creating a cross section view.
- Make a plastic tube that will fit snugly into the top of a plastic drink bottle. The plastic tube works well if you use an empty laminator pouch, put the pouch through a laminator and then roll it.
The size of the bottle will depend on the size of your volcano. The top of the plastic tube needs to reach the crater of your volcano.
If you are using sand, you may need to put another circular piece of plastic at the top of the plastic tube, to stop the sand from falling in. A small funnel would work. - Put ¼ cup of water with 20 drops of red food colouring, and ½ cup of baking soda into the bottom of the bottle. Then insert the plastic tube and the funnel.
Put all of this into the “inside” of your volcano. Explain to the students that the mixture inside the bottle is magma. Magma is the molten volcanic rock when it is still under the Earth’s crust.
When the magma heats up, pressure starts to build and the magma pushes through the Earth’s crust. Then it is called lava. - Add vinegar to the baking soda mixture and have the children observe what happens. They can draw or write their observations after the experiment.
Take special note of the way the lava flows down the side of the volcano. That will be important when you talk about surviving a volcanic eruption.
To make this experiment more realistic, cut a hole in the bottle and insert some fine plastic tubing. Have this tubing come out of the back of your volcano. Push the vinegar through it with a squeezy bottle or a syringe. Add a small light piece of paper over your volcano crater, so that the students can see the eruption pushing through the Earth’s crust.
Find more resources for teaching students about volcanic activity.
Find out about past volcanic eruptions that have happened in New Zealand.
Impacts
-
Setting the scene
Write the six common emergency events on the board or wall, and give the class with pictures of each event. Have pictures of before, during and after. Decide where each picture fits and what is happening in each one. Identify and discuss features of the land, people and buildings.
The IMPACTS team
Introduce the students to the seven impacts for emergency events via the IMPACTS team and Get your household ready.
Explain that the IMPACTS team are just like the students. They can have a big impact when they get ready for emergencies, and help other people plan too.
Explore each impact separately. Divide the class into groups to record their thinking in response to the following questions.
- Imagine having no water for three days or more. How would you wash, cook, clean? What would you drink?
- Trains and buses may not run, roads may be closed and streets or neighbourhoods might be blocked off. What would you do?
- Some houses and neighbourhoods may not be safe to stay in and you may have to leave home in a hurry. What would you do?
- What would you do if the power was out for days? How would you see, cook, keep warm?
- In most emergencies, it’s best to stay in your own home if it is safe to do so. But that may mean being without power and water as well as living in a damaged building. What would you do?
- If the phone and internet were down, how would you keep in touch, arrange to meet up, keep up with news and weather alerts?
- The objects in your home could move, fall or break in an earthquake. What could happen? Could one room in your house be worse than another?
Encourage creative and critical thinking. Students could sketch some of their solutions or have materials to construct their ideas.
As a class, analyse the suggestions and try to pick out the ones that could be done quickly and easily. Ask students to look at the IMPACTS team and see what they can find to help answer the questions. The superheroes will give them a clue.
Highlight one impact a week in your classroom for six weeks.
Every week, students can design a way to share information about that impact with the community. Consult with the students about how you could feature the impact to:
- get the most people looking at the information, and
- how they can engage the school community in getting these messages across.
-
What if...?
Revisit your impact ideas by playing the “What if?” game. Start by asking a question. For example:
- What if there was no water?
- What if your chimney was damaged?
Record students’ ideas, discuss what is realistic, and decide on the best solutions. Encourage students to ask “What if?” questions too. Often they may ask something you haven’t thought about.
This is a good way to find out how students are feeling. Explain that it’s normal to feel scared about what might happen, but that the likelihood of an emergency event happening is very slim. The best way to feel better is to be prepared and know what to do.
Remind students that practising routines in a calm manner will help their brains remember what to do when they feel panicked. Practising both at home and at school will help them to know what to do wherever they are.
Visual checklist
As a class, explore and discuss the following.
- Get your household ready — for the things whānau will need if they find themselves part of an emergency event.
- Be Prepared(external link) — for Natural Hazards Commission Toka Tū Ake’s guide on how to quake safe your home.
Ask students to develop a visual checklist to take home. Emphasise the items like phone numbers that do not have a cost.
Challenge each student to spend a week or two gathering together the items needed and bring back the completed list.
Developing plans
Develop a plan and prepare for impacts as if your class were all living at school. What would you need? Why?
- Make a plan
- Read how to Be Prepared(external link) and describe what might need to be fixed and fastened in your classroom.
Challenge other classrooms in your school or local area to do the same, and share your work.
Follow up
Here are some follow-up activities students could do.
- Design their own impact superheroes, or develop some more props for the IMPACTS team.
- Write about the IMPACTS team using descriptive or creative writing.
- Write a blog post, make a video or animation, or give a presentation at a school assembly persuading people to get prepared.
- Write an earthquake-safe checklist for their home.
- Write an email to someone at home describing an emergency impact and what they will need to prepare at home. For homework, they can take pictures of their preparation and send them back to class in a reply email.
- Create a series of class blog posts.
- Create a statistical survey about how prepared the school community think they are. Work out how much water the whole class would need for three days, and then the whole school. Plan a preparedness kit and price up all the items, working out how you could achieve the best kit for the cheapest price.
-
Share your learning from What’s the Plan, Stan? by organising an emergency impact day.
Invite whānau and the wider community, including the local newspaper, as well as other classes from your school.
Assign an IMPACTS superhero to groups in your class for the emergency impact day. Here are some things your students could do on the day.
- Fill out an emergency plan and quake-safe checklist with their visiting whānau, to take home.
- Encourage visitors to practice drills and evacuation procedures.
- Dress in the colour of their superhero.
Impacts

Visit the Natural Hazards Commission Toka Tū Ake website for more information on making your home safer.
Have a showcase of your students' learning with the help of digital tools like these.
Virtual Field Trip — Get ready for an emergency
Take a virtual field trip to explore some of our natural hazards and emergencies in Aotearoa.
Just search for 'emergency management' in the Inquiry Topics drop down to find past field trips about emergencies.
Take a Virtual Field Trip (learnz.org.nz)
Earthquake resources

Watch this video on earthquakes produced by National Geographic.

Listen to the sounds of an earthquake in this video created by Georgia Tech

Read school journal stories useful for teaching earthquakes.
Read this story about earthquakes in English and te reo Māori.
pdf | 303 KB
pdf | 489 KB
Use this resource from Te Papa to teach students to create resilient communities.
Flood resources
Use this map to adjust floodwaters to show how much of the land could end up under sea level.
Read Beth's story about floods in English and te reo Māori.
pdf | 316 KB
pdf | 557 KB
Landslide resources

Watch this video on landslides produced by National Geographic.
Storm resources
Read this story about storms in English and te reo Māori.
pdf | 240 KB
pdf | 587 KB
Tsunami resources
Watch this video on tsunami produced by National Geographic.
A collection of school journal stories for teaching tsunami.
“The Race” by Rose Quilter. School Journal, Part 3, No. 1, 2011.
“The Strength of Roots” by Marisa Maepu. School Journal, Level 4, March 2012.
Volcanic activity resources
Watch this video on volcanoes produced by National Geographic.

A collection of school journal stories for teaching volcanoes.
“A Bit of a Bang” by David Hill. School Journal, Part 4, No. 3, 2004.
“Understanding Volcanoes” by Tessa Duder. Connected 1, 2011.
Read this story about volcanic eruptions in English and te reo Māori.
pdf | 300 KB